| FAQ |
| Do FP23 & SR23 work via a 2100-NET ? |
Yes they do (tested 17/10/2008)
Setup Instructions :
1. 2100-NET
Setup ip address using XPORT Installer.
DIP switch settings 1,2,3,4,5 ON, 6 OFF.
2. FP23 & SR23 wire to 2100-NET
Connect controller to 70,71 & 74, following 2100-NET wiring diagram.
3. Add stations to MicroScan:
Use Configure Pages and Lines and add stations manually according to each station used.
4. Setup Ip addresses
Click MicroScan Interface, Enable Ethernet mode.
Click IP Settings to setup the up the address and port number for each controller.
5. Shimaden Monitor
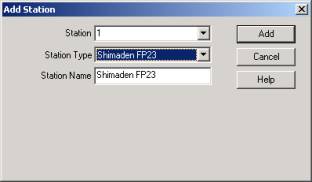
Add stations manually, using Add Station Controller link on Shimaden Home.
6. Configure Pages and Lines
Configure pages and lines normally as per serial controllers. The mapping between the controller and the 2100-NET is taked care of in the IP Settings dialog box above.
Example Screen shots of setup operations:
Add the controller locations manually using Configure Pages and Lines
Right click on station map and click Add Station

Enter details as needed and click OK.
Enable MicroScan Interface for Ethernet Mode
On Setup Tools, click MicroScan Interface
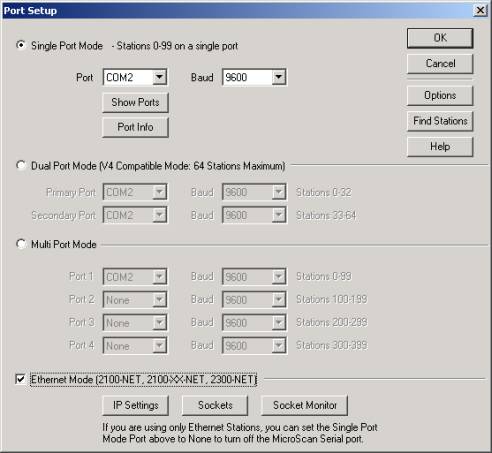
Enable Ethernet Mode.
Set Single Port Mode port = None, to indicate to serial COM port connections used.
Click IP Settings to add an ip address for each controller
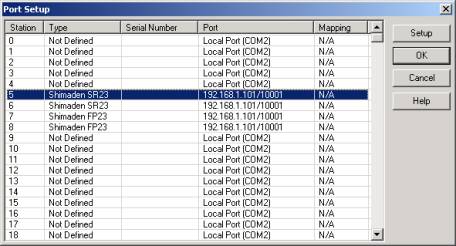
Double click on each controller and set the ip settings to match that of the 2100-NET
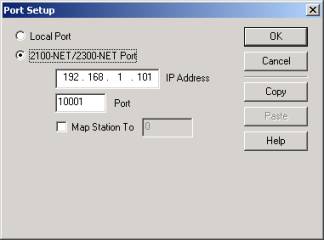
Enter ip address and use port 10001.
Now when setting up lines or tags to the controller, just use the station map on configure pages and lines as you would a controller connected via COMS.
Add Controller to Shimaden Home
Click Shimaden Home
Click Add Shimaden Controller
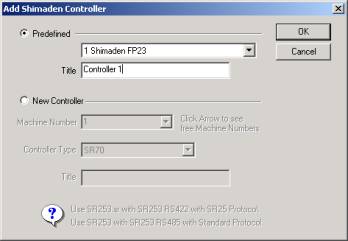
Select Predefined and choose the machine, enter a title and click OK.