| FAQ |
| Example setup steps for setting up a XPORT on 2100-A16-NET, 2100-NET |
Use
XPORT Installer software (needs xport installer and microsoft .net 1.1).
A static IP address must be assigned.
The default factory set ip address is 192.168.1.100, port number 10001
You may need to open a hole at the attached ip address and port number in your
firewall.
If this address is free on your network, and your ip address is 192.168.1.XXX,
then the XPORT installer does not need to be used.
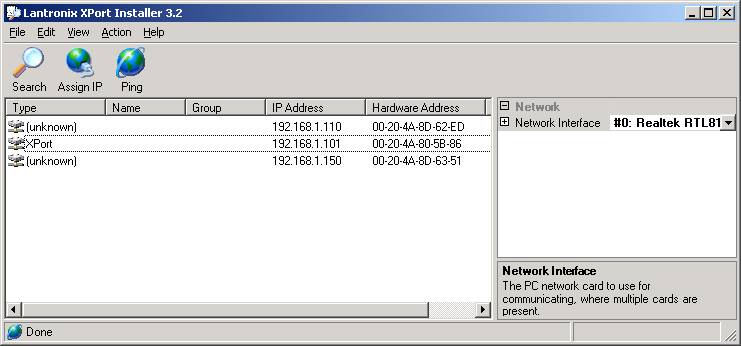
Start
XPORT Installer
Click
Start, All Programs, Xport Installer, Xport Installer.
Click
Seach to locate XPORTs on the local subnet.

A
message may appear showing
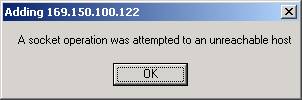
Click
OK
This
shows that the XPORT has an ip address not valid for the local subnet. Click OK.
An ip address needs to be assigned.
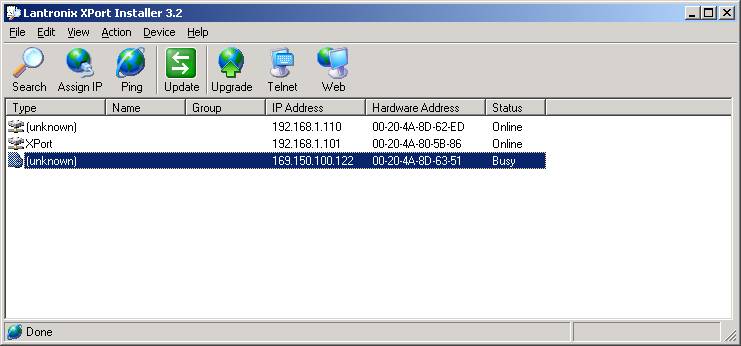
Option
1:
To
Assign IP address, select the XPORT from the list, and click Assign IP.
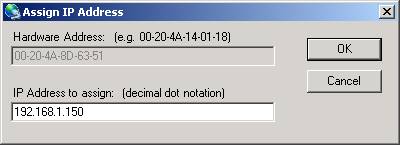
Enter
the new ip address and click Ok.
Waiting
for reboot appears...

Then
device is programmed as below.
Option
2:
To
assign an ip address when the XPORT has already been programmed with an IP
address, but has not been located on your subnet.
Click
Action, Add Remote Device.
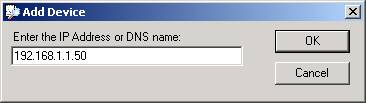
Click
OK.
Option
3:
To
assign an ip address using the XPORTs MAC address
Click
Action, Assign IP Address.
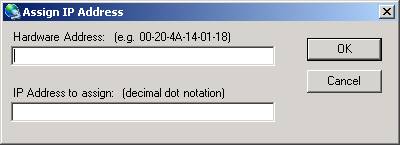
Enter
the hardware address (written on the LID of the XPORT in the A16, will always
begin with 00-20-4A).
Enter the desired IP address
Click OK.
Checking
the Connection.
Use
PING in a command prompt to see if the XPORT is working.
type
ping 192.168.1.150 (enter)
Responds
with messages showing unit is OK, or not responding.
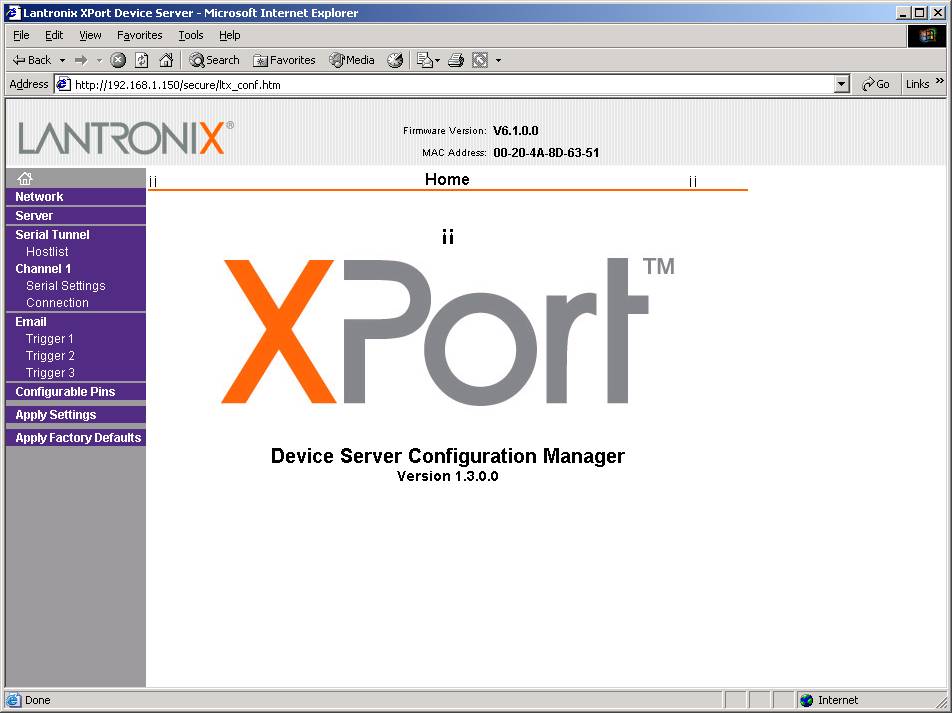
Setting
up the XPORT using a web browser (after ip address has been set).
Start
the Internet Explorer and type the following for the address
http:\\192.168.1.150 (hit enter)

If a
password dialog appears, click OK.
Examples of settings provided.
These settings are factory set and may not need to be changed.