| FAQ |
| Setting up a 2100-NET to use as a PLC port redirector |
Ethernet Cable
Before connecting ethernet cable to 2100-NET, check the cable is not phyiscally damaged or burred as the XPORT pins have no physical protection.
Note on Port number:
The port number is 14001 in the XPORT, and 3001 in the Redirector software. These number should be set to these values.
Setup of the 2100-NET
Use the XPORT Installer to setup the XPORT on the 2100-NET.
Use the IP address given by the network administrator. Do not use DHCP.
Start the XPORT Installer.
Click Search to locate the 2100-NET.
Click on the device and click Assign IP.
Enter IP Address and click OK.
Wait for the device to reboot.
Once programmed, find "Ports" on the right hand side, and click the
"..." button.
Enter 0:15 for the inactivity time out.
Enable Packing should be true.
Use 14001 for Local Port.
PORT SETTINGS:
VERY IMPORTANT NOTE: Set the port settings Baud Rate, data bits etc here in PORTS, as
they are set in the 2100-NET, NOT BY SETTINGS IN THE COMPUTER.
For example, to use with an omron PLC, set up as 7 bits, even parity.
The default settings are shown.
Click OK.
Click Update.
Wait for the device to reboot.
Setup of the Lantronix Redirector (red32bit.exe)
Start the Redirector Configuration.
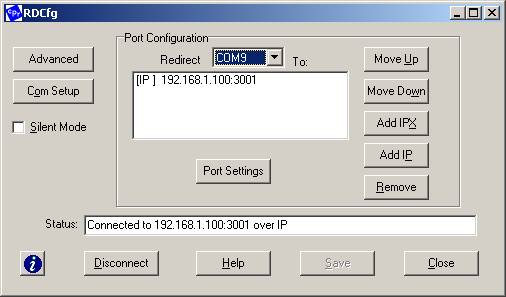
Click COM Setup to select the port to use for the mapping. (Use COM1-9 only).
Click Add IP,
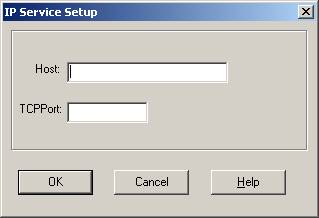
Add the IP Address above and use port 3001.
Click OK.
Click Port Settings.
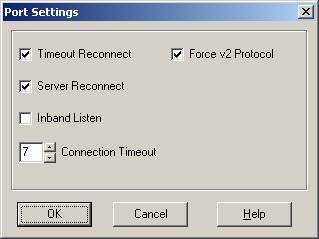
Click "Timeout Reconnect" on
Click "Server Reconnect" on.
Click "Force V2 Protocol" on.
Click OK.
Click "Silent Mode" Off to allow you to see connection dialogs as
the port is connected/disconnected.
Set to on when it all works.
Click "Save"
Need to reboot computer after adding a new COM port.
This supports only 1 computer connecting to one 2100-NET at one time.