| Help Topics |
| Demo Shimaden Controllers |
This demo shows how to connect a SR90 controller to MicroScan.
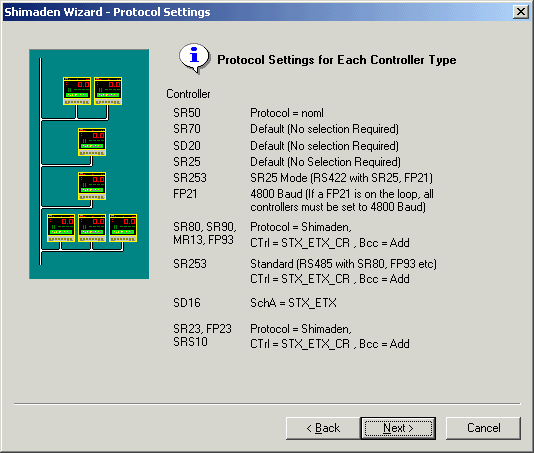
This demo shows the connection to SR93, the other Shimaden Controllers will be
setup in a similar way, see Shimaden
Controllers Setup for MicroScan Use for each controllers settings.
Equipment needed
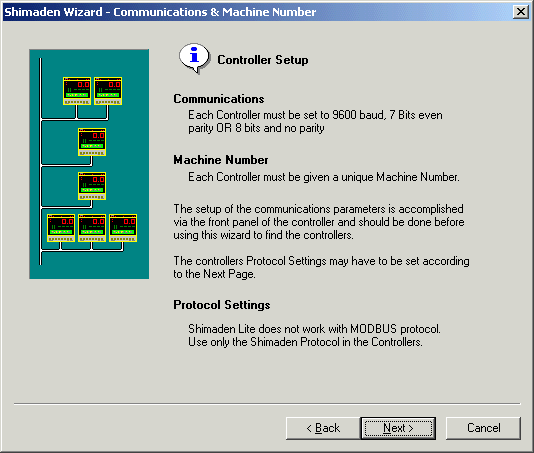
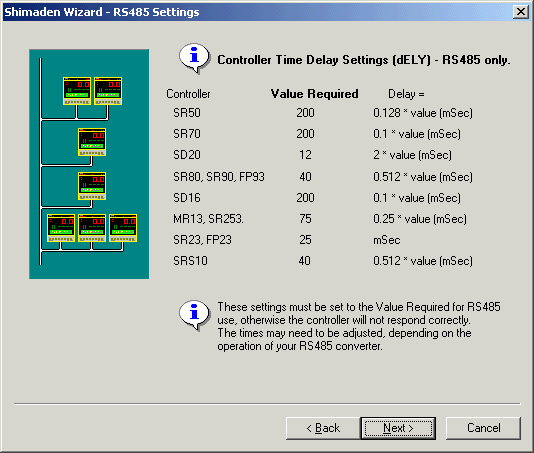
| SR93 | Power and Comms (+,- and SG) connected Controller Settings: Addr 1 data 8n1 Scha stx bcc 1 bps 9600 dely 40 |
| Converter | RS485 converter (2100-IS linked for 485 S2 1,2,3,4 ON) (70
to -, 71 to + 74 to SG) or USB 485 (Yellow -, Blue +, Green SG) |
| Computer | Connect to COM1, to change port use MicroScan Interface link. |
Summary of Steps
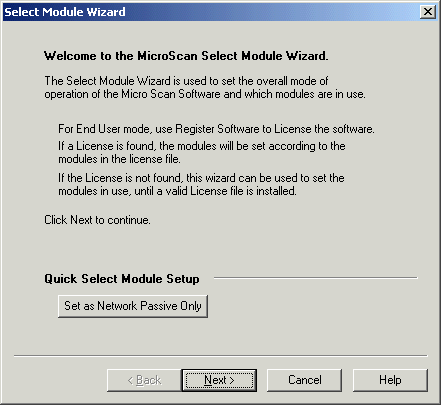
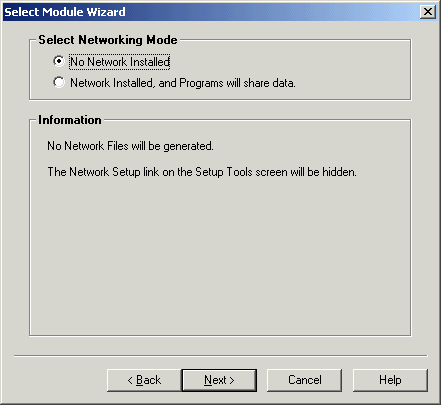
Select Tag mode Using Select Module Wizard
Click Select Module Wizard
Click Next
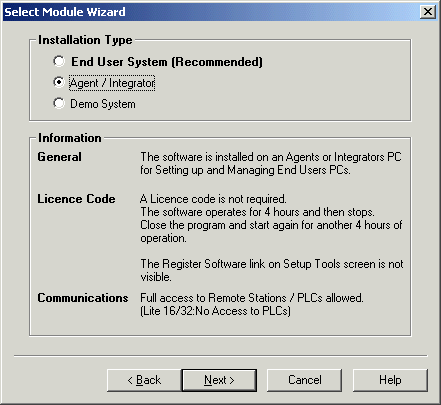
Click Next
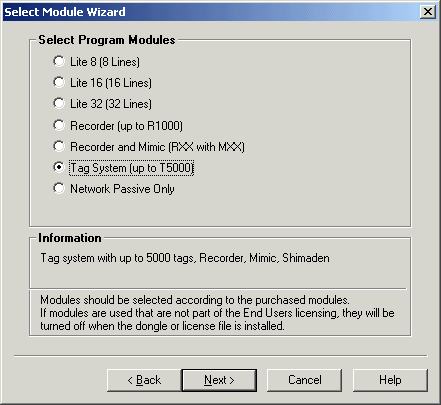
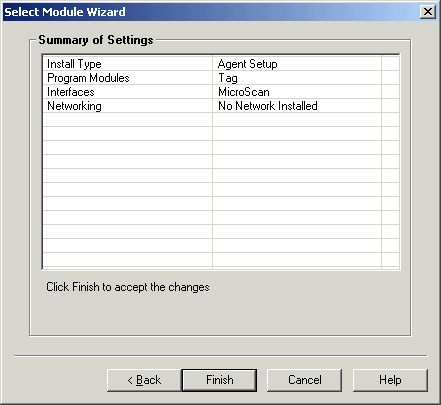
Select Tag System, click Next
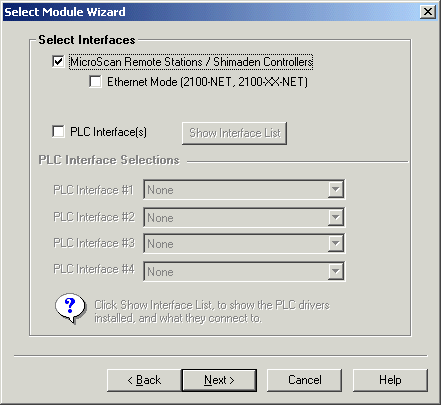
Click Next
Click Next
Add Controller using Add Station Wizard
Click Add New Station
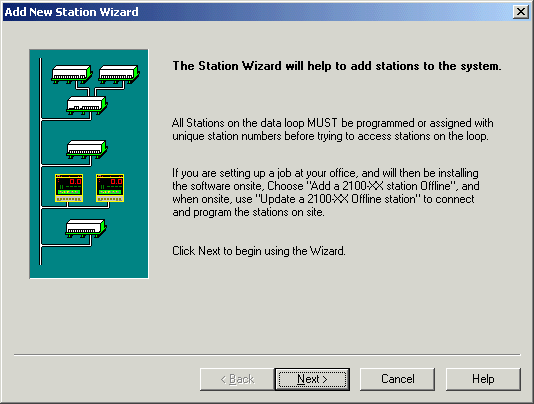
Click Next
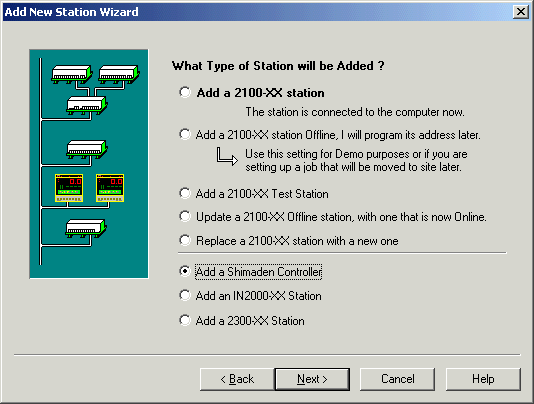
Click Add a Shimaden Controller, click Next
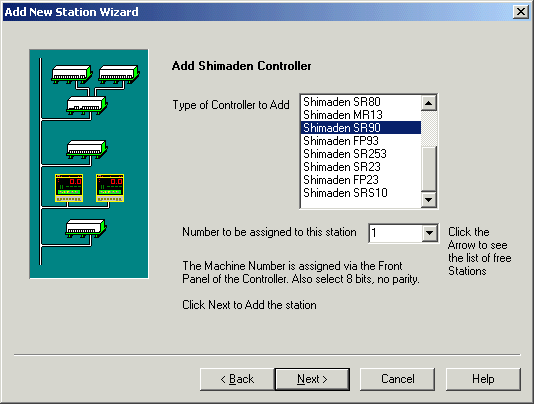
Click Next
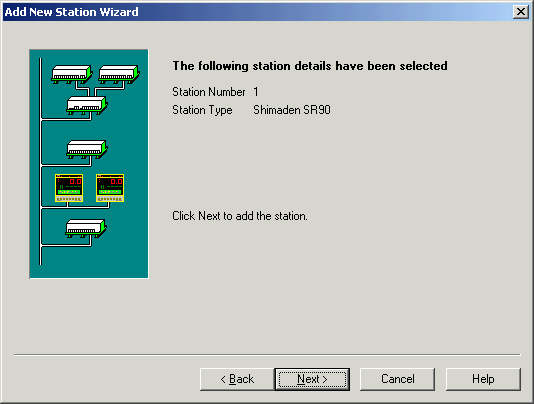
Click Next
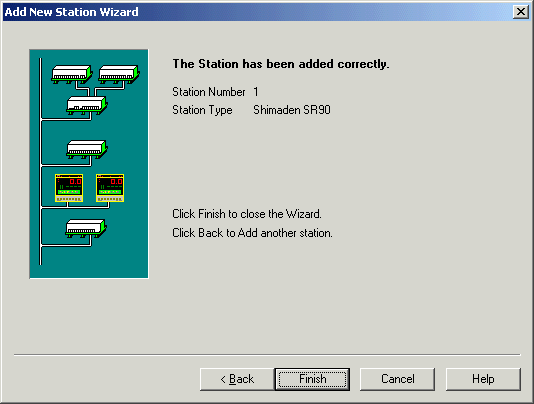
Click Finish
Configure Lines to connect to Controller
Click Configure Pages and Lines.
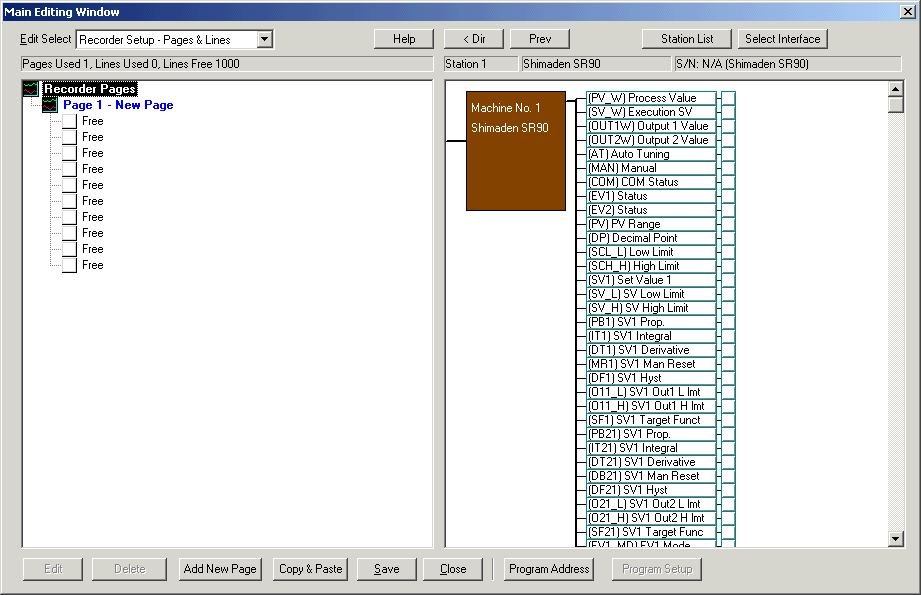
Double click on the SR90, to show all its connection points as shown above.
Click a point and drag over to a free line to create a line.
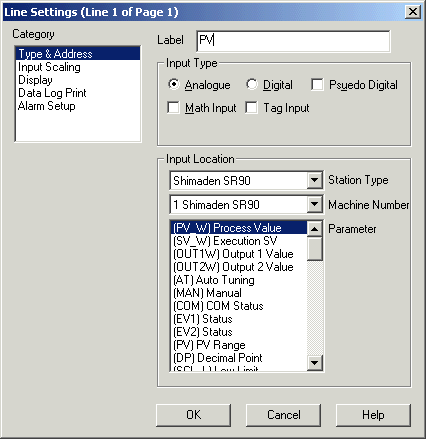
Enter a label and click OK.
Repeat for other settings required.
Click Close, Save.
Add Controller to Shimaden Home
Click Shimaden Home on the Navigation Tree
Method 1: - add manually
Click Add Shimaden Controller
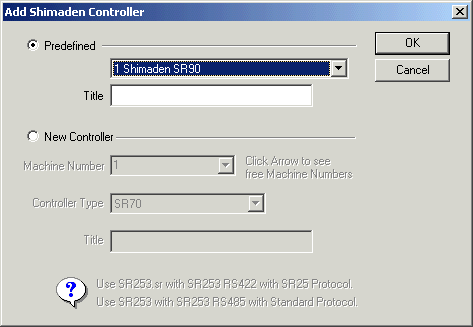
Select the Controller from the Predefined list (i.e one added previously
using Add New Station), click OK.
The controller will be listed under Shimaden Home.
Add Controller to Shimaden using Shimaden Wizard
Click Start Shimaden Wizard
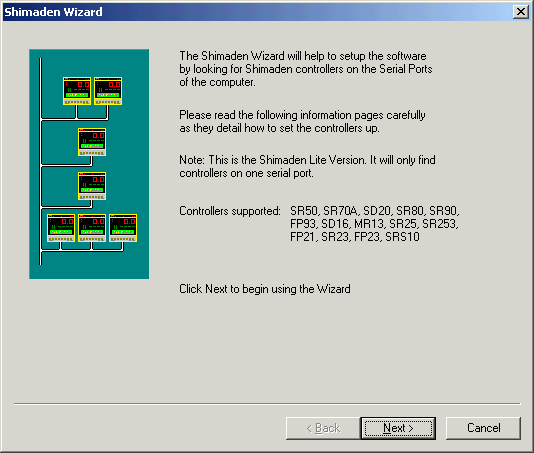
Click Next
Click Next
Click Next

Click Next
Click Next
Click Start
Progress Window
Operation complete, click Next
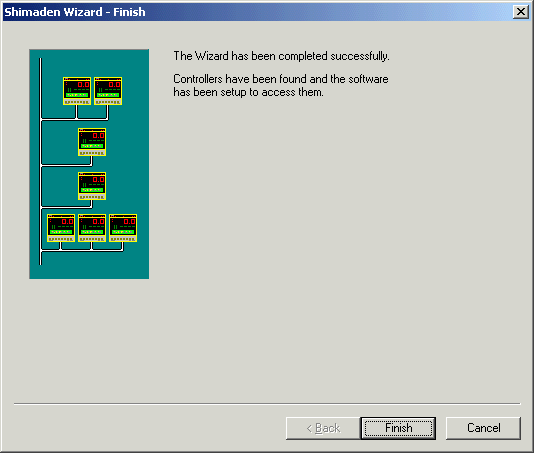
Click Finish

Clink the COM Mode button to put the controller into COM mode, you will then
be able to write SV etc settings to controller.
Click the COM Mode button to put controller to LOC mode and set back to front
panel operation.