| Help Topics |
| Step 2 Setup and Test Station |
Once the station has been added, the station input ranges need to be setup to measure the correct signals.
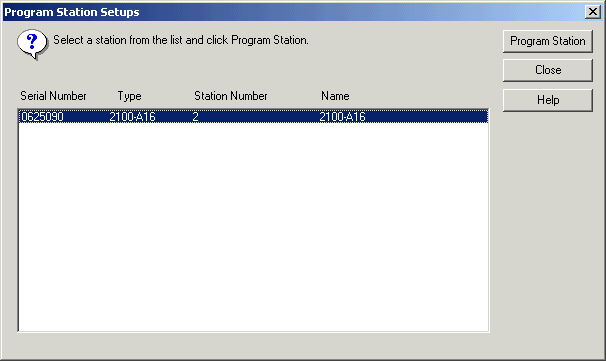
Click the "Program Station Setups" link.

Click Yes to start the operation.

Select the station, and click Program Station.

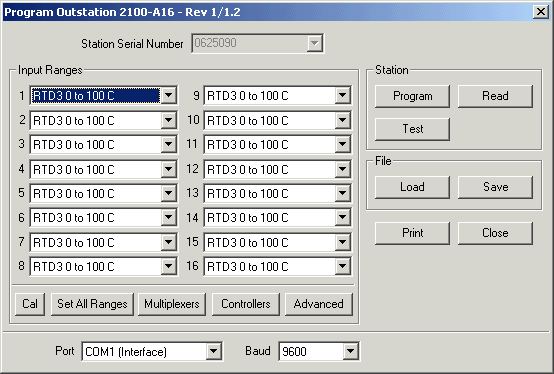
A progress window will be displayed, and then the above window will be shown.
Change ranges by selecting the new range for each inputs.
Ranges for all inputs change can be changed all at once using Set All Ranges.
Inputs set to RTD or TC ranges will be auto scaled to those ranges in the
station. However DC ranges such as 4-20 mA will need scaling setup in the lines
in the Recorder, so the line will know that 4 mA means one value and 20 mA means
another.
NOTE: After making settings, click Program to write changes to the station. A progress window will be shown.
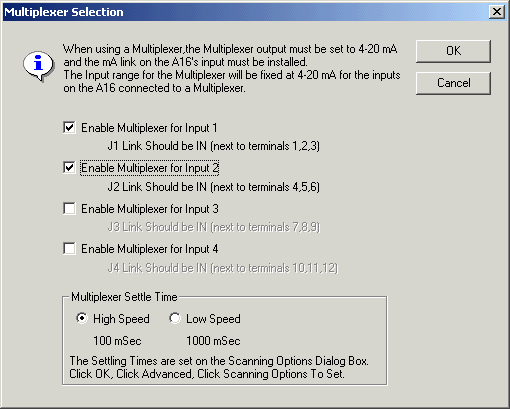
Click Muliplexers, to enable 2100-M connections on inputs 1 to 4. You will be
advised to insert J links (J1 to J4) if each expander is fitted.
NOTE: If the J link is not fitted, the expander input will always read 100% on
the station test dialog box.

Click OK, and click Program again to write changes to station.
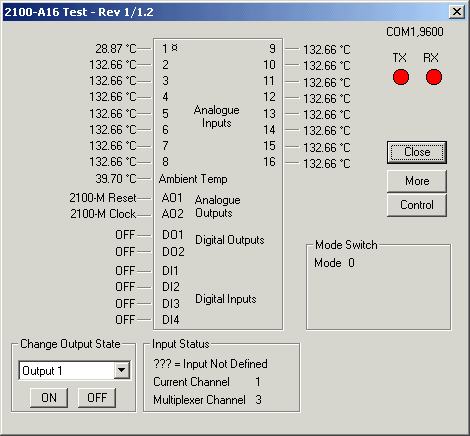
To test station, click the Test button.

This will show the reading of each input. Click Close.
Note: When all inputs are assigned, it takes 4 seconds to read all inputs on
the A16.
TX and RX lights are for a rough indication only and do not show true comms
activity. This can only be seen on converter/A16 comms LED lights.