| Recorder User Help |
| History Export Data |
The History Window can be used to export data in a variety of formats for use in other applications. These include CSV files and bitmaps. To Export data, firstly use the History window buttons to move the graph back to the time and date that you want to export, or generate a User Defined Graph of the required size.
To Export Data from the History Window, the Export History Data dialog box is used, click on the Export button on the History Tool bar.
Export Data To Clipboard
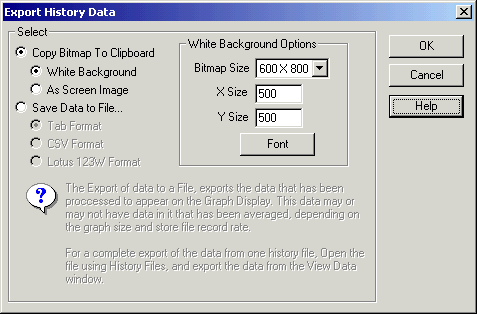
To Export the History Window as a White Background bitmap image to the Clipboard.
Þ
On the History Toolbar, Click on “Export”
Þ
Click “White Background”.
Þ
Choose the Bitmap size or set the Bitmap size to custom and enter
the size of the bitmap in the X Size and Y Size edit boxes.
Þ
Choose a Font by pressing the Font.. Button. Choose a Font and
Press OK.
Þ
Press the OK button.
To Export the data as colour, “Colour Printer” must be turned on in the Recorders Printer Settings dialog box.
To Export The History Window as a Black Background bitmap image to the Clipboard.
Þ
On the History Window, Click on “Export...”
Þ
Click “As Screen Image”.
Þ
Press the OK button
Export Data to File
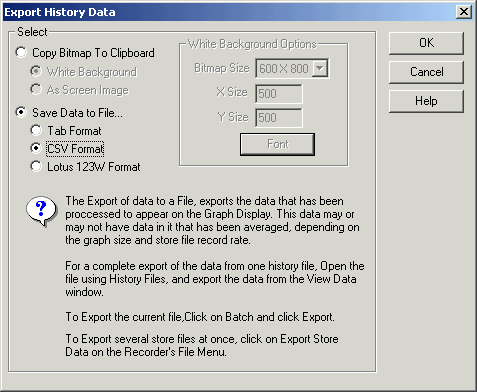
To Export the History Data into a file.
Þ
Use the Line Details dialog box to select the lines to be saved.
Lines not visible on the graph will not be saved.
Þ
On the History Window, Click on “Export...”
Þ
Click “Save Data To File...”
Þ
Choose the format type “Tab”, “CSV” or “Lotus 123W”
Þ
Press the OK button
Þ
Enter the Filename into the Save As dialog box and press the OK
button
The data to be saved is extracted from the data that was used to generate the History Window. If the graph shown is a User Defined Graph, less than 2880 points may be saved according to the amount of compression used to generated the graph. On fixed time zone graphs i.e 15 Minute, 30 Minute etc, the number of points saved is equal to the number of points required to display the graph.