| Setup MicroScan |
| Program Station Setups 2100-A16 |
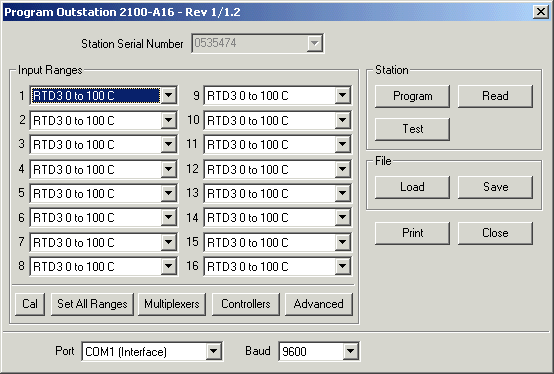
2100-A16 Programming screens
When the window is first displayed, the software will auto read the current settings from the station
Select Input ranges for Inputs 1-16. Note DC mA input ranges must have
associated J link inserted at the station.
Click Program to write changes to station. Click Test button to Test station
online.
Calibrate Inputs
Click Cal
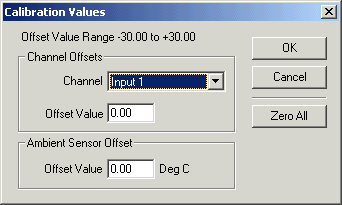
Select the channel and enter the offset. Click OK. Click Program to write
changes to station.
Note: This value is retained in the station, and is NOT audit tracked using the
software, See Calibrate Lines for
online calibration and audit tracking of line values.
Set All Ranges
Click Set All Ranges
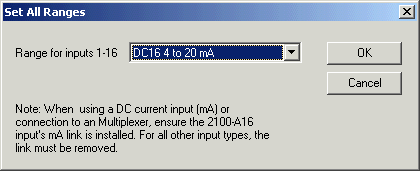
Select the desired range and click OK. Click Program to write changes to
station.
Note DC mA input ranges must have associated J link inserted at the station.
Multiplexers (2100-M)
Click the Multiplexers button.
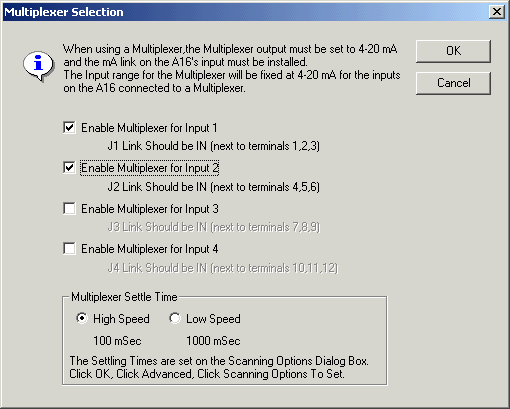
Enable the MUX for each input. Follow the notes and install J link next to
each input that has a multiplexer attached.
Click OK. Click Program to write changes to station.
Controllers
To setup onboard station controllers, click Controllers button.
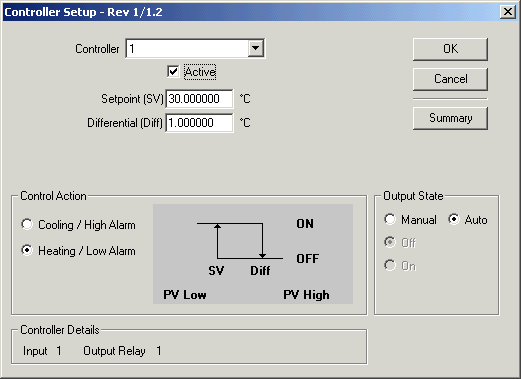
Select an input, and click Active to enable the controller.
Enter the setpoint and differential as required.
Click OK. Click Program to write changes to station.
Advanced Settings
Click the Advanced button
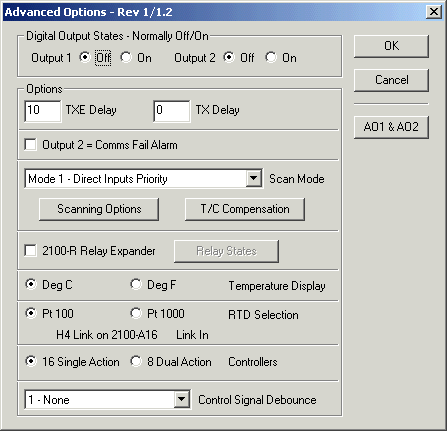
Make changes and click OK. Click Program to write changes to station.
NOTE: For Pt1000 inputs, all RTD inputs are Pt1000, and the H4 link on the 2100-A16 must be removed.
Advanced Settings - Scanning Options
Click Scanning Options.
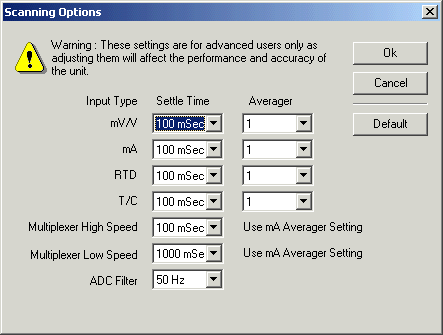
Click OK. Normally settings here would not be changed.
Advanced Settings - T/C Compensation
Click TC/Compensation
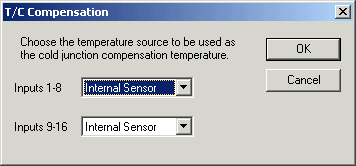
Select an RTD input on inputs 1-8 for TC compenstation for Inputs 1-8.
Select an RTD input on inputs 9-16 for TC compenstation for Inputs 9-16.
Note: Should not use an TC input as the compenstation input, only use RTD.
Click OK.
Advanced Settings - Relay States
Enable 2100-R Relay Expander, Click Relay States
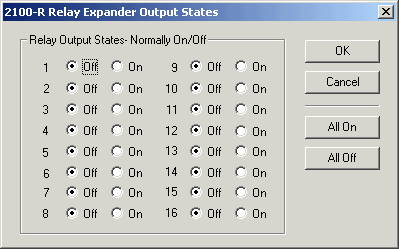
Select the state for each relay normally on or off. Click OK.
Advanced Settings - AO1 & AO2
Click AO1 & AO2 button.
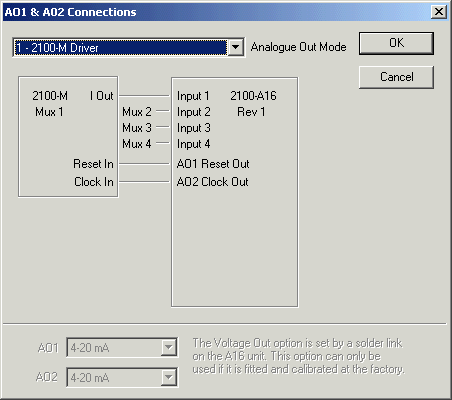
Select the AO1 & AO2 mode from
Each mode a overview connection diagram is shown, for more detail see the A16
install guide.
Click OK.
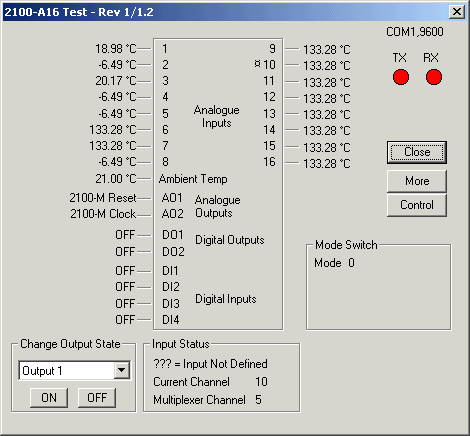
Station Test
Click Test button