| Setup MicroScan |
| Program Station Setups 2100-A4 |
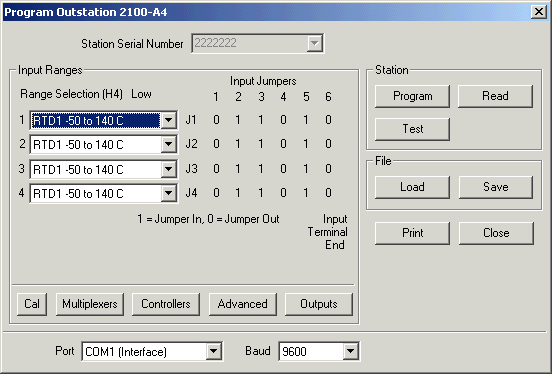
2100-A4 Programming screens
Note: for 2100-A4e, screens are identical, except for Advanced Settings which allows settings output states of extra output relays 5-8, and Test Dialog allows viewing and testing of outputs 5-8.

When the window is first displayed, the software will auto read the current settings from the station

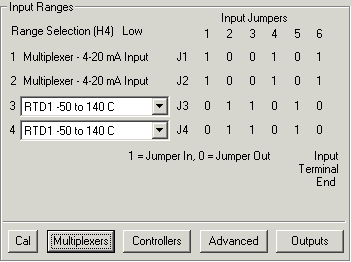
Select Input ranges for Inputs 1-4. Note the input jumpers must be changed to suit the settings shown above according to the input range selected.
Calibrate Inputs
Click Cal
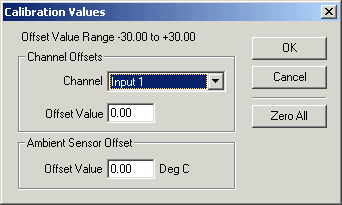
Select the channel and enter the offset. Click OK. Click Program to write
changes to station.
Note: This value is retained in the station, and is NOT audit tracked using the
software, See Calibrate Lines for
online calibration and audit tracking of line values.
Multiplexers (2100-M)
Click the Multiplexers button.
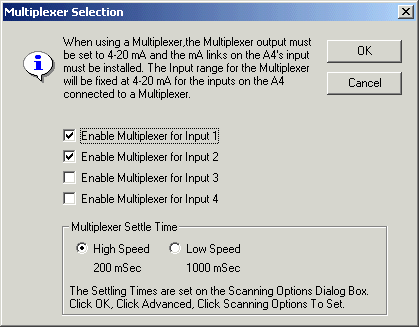
Enable the MUX for each input. Each Mux input will be assigned to 4-20 mA
input, and the input links will need to be set accordingly, as shown below.
Click OK. Click Program to write changes to station.
Controllers
To setup onboard station controllers, click Controllers button.
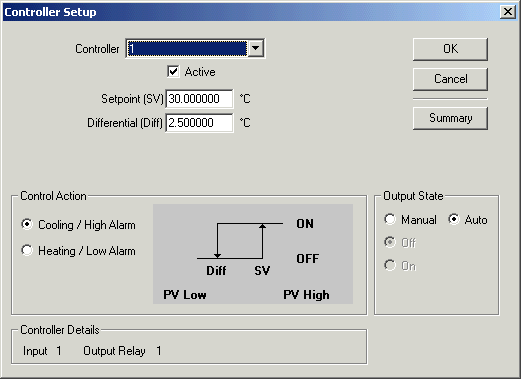
Select an input, and click Active to enable the controller.
Enter the setpoint and differential as required.
Click OK. Click Program to write changes to station.
Advanced Settings
Click the Advanced button
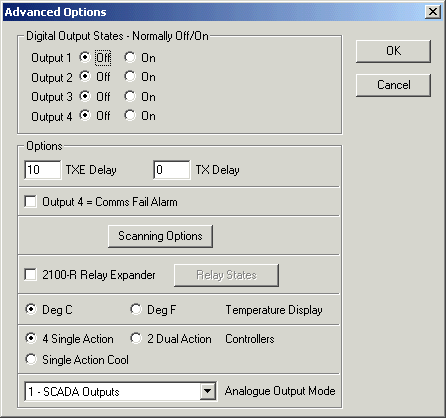
Make changes and click OK. Click Program to write changes to station.
Outputs
Click the Outputs button.
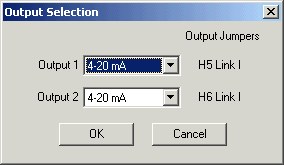
Select the output range and click OK. Click Program to write changes to station.
H5 and H6 Links should be set in I or V position to match the selected range.
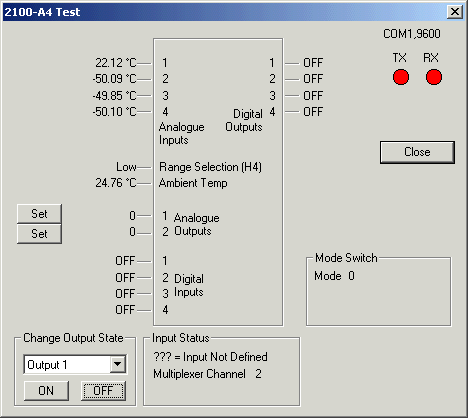
Station Test
Click Test button
