
| ZigBee Wireless Data Links | |
| Setup Inputs on A Sleeper |
The XU Setup software is used to setup the input ranges of the sleeper. This requires version XU Setup 1.30 or later. You will also require the XU-USB programming key.
While programming the sleeper via XU-USB, sleeper comms to the base will NOT take place.
See Also:
Sleeper
Input Connections
Changing
Sleeper Mesh ID
Configuration Steps:
Power up the sleeper using DIP B SW8 or attach a plug pack power supply to
the sleeper power supply inputs.
Attach the XU-USB lead to the PROG input in the front of the sleeper (LED 2
flashes once every three seconds).
Make sure the PROG plug is pushed fully home.
Click the Connect button to connect to the sleeper
Connection being established:
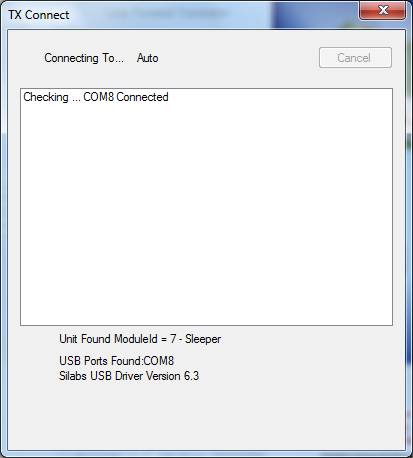
XU Setup connected to sleeper showing CH1 settings
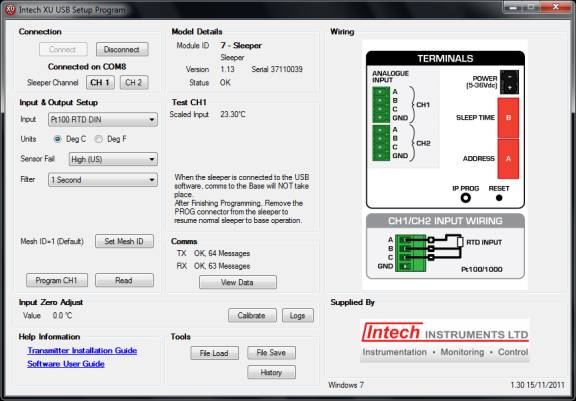
Make changes and click the Program CH1 button to program CH1 settings.
While
connected the software shows the current input readings in the Test Panel, and
the wiring information in the Wiring Panel.
A Max filter setting of 5 seconds is allowed in Filter settings.
Click CH 2 button to view CH 2 settings
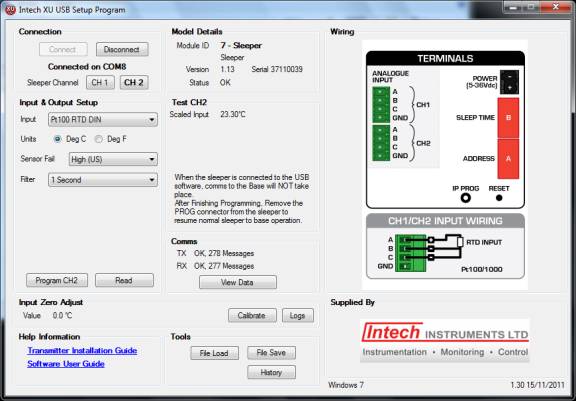
Make changes and click the Program CH2 button to program CH2 settings.
When the Sleeper is disconnected from the XU-USB, it will begin its startup
sequence and start to connect to the base.
LED 2 will go on and then shortly after LEDs 1,2 will toggle indicating a
connection to the base is established.
For further details on the XU Setup software, please see XU Setup (web connection required)
NOTES:
a) You cannot set the sleeper range remotely from MicroScan, but MicroScan will read these ranges settings back to the base.
b) You cannot read the DIP SW A/B settings or the sleeper battery voltage into
XU Setup.
c) You cannot check for a sleeper to base connection while XU Setup is
connected.